
GameDevlog 1: Tilemap Generation
Overview
In this step I create an Editor Mode HUD in order to create tile maps while adjusting input parameters from the UI. Prior to this step, generating tile maps required going into the blueprints, manually making changes, recompiling, and then running to see the result.
I’m not going to walk through every step and every node, I’m going to try to paint a more general picture of the process and decisions being made. If you’re working on a similar project and are stuck on something I didn’t explain (whether I skipped it, I didn’t explain it in detail, or I just explained it poorly) feel free to reach out on Discord and I’ll help out if I can.
HUD Requirements - TileMap Generation
Here are the main features and functionalities I needed from the HUD in this step
- Ability to select generation shapes
- Ability to select tile type
- Include toggles for drawing debug
- Include toggles for tile info
Learning Goal
- Get comfortable with the basics of working with UI elements in Unreal Engine 5
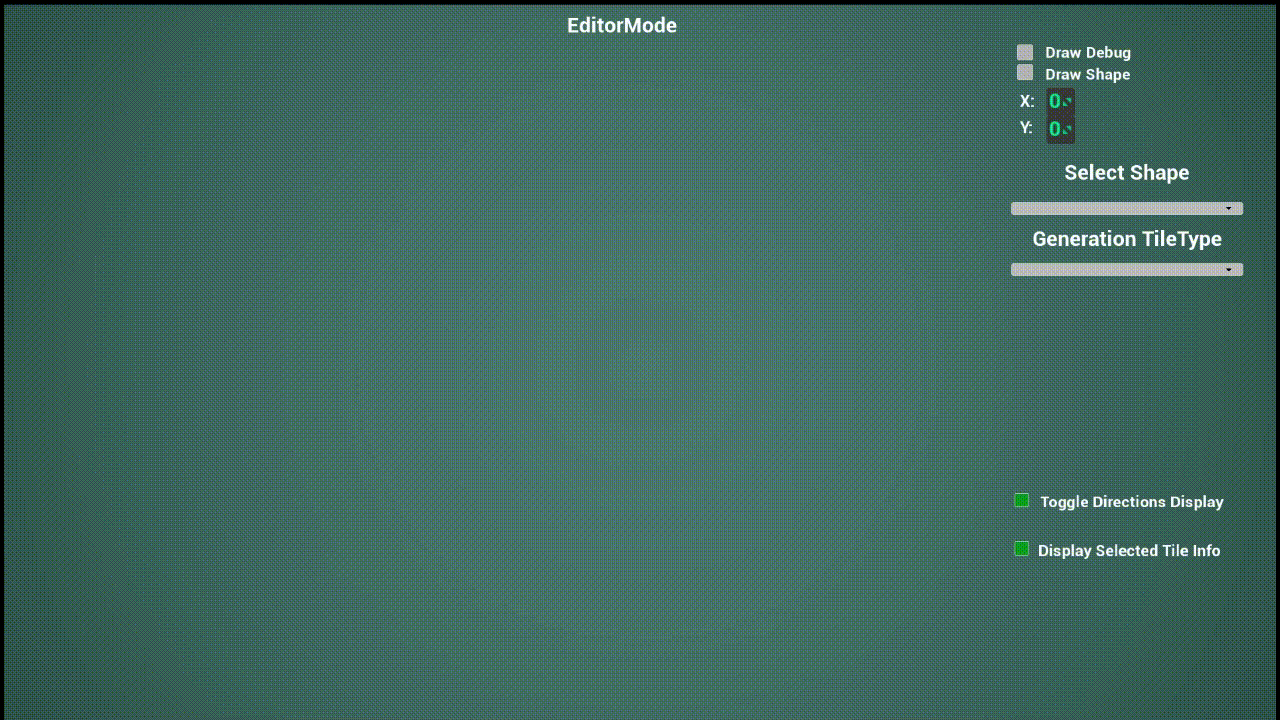
End Result
This is a demo showcasing the progress that was made in this entry. I demonstrate the draw shape toggle, resizing the shape with the X and Y Spinboxes, selecting different shapes, and selecting different tile types to generate. After completing the steps below, I hooked it all up to a Key Event, where it takes in the input parameters as determined by the HUD elements and then uses those to actually generate the Tile Map.
Starting off
Beginning this entry, I knew nothing about working with UI elements in UE5, so I used this YouTube tutorial as a reference in order to set up a basic UI widget with a canvas.
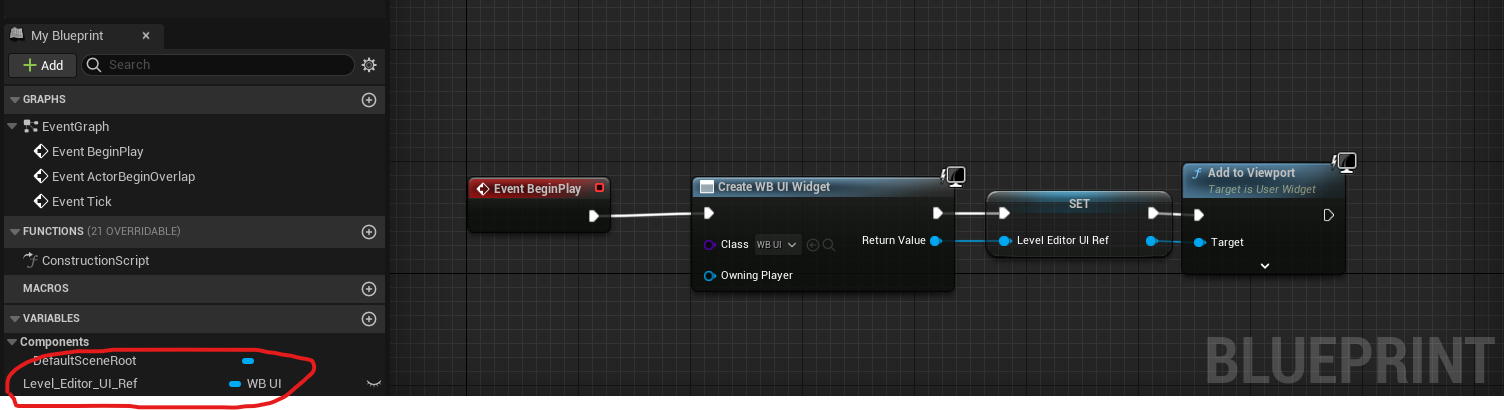
Following along with the above video, I created this HUD blueprint and UI Widget. Note that the variable we create here that holds a reference to that UI Widget, here labeled Level_Editor_UI_Ref, is how we’ll interface with the UI from our other systems (ie the Tile Manager).
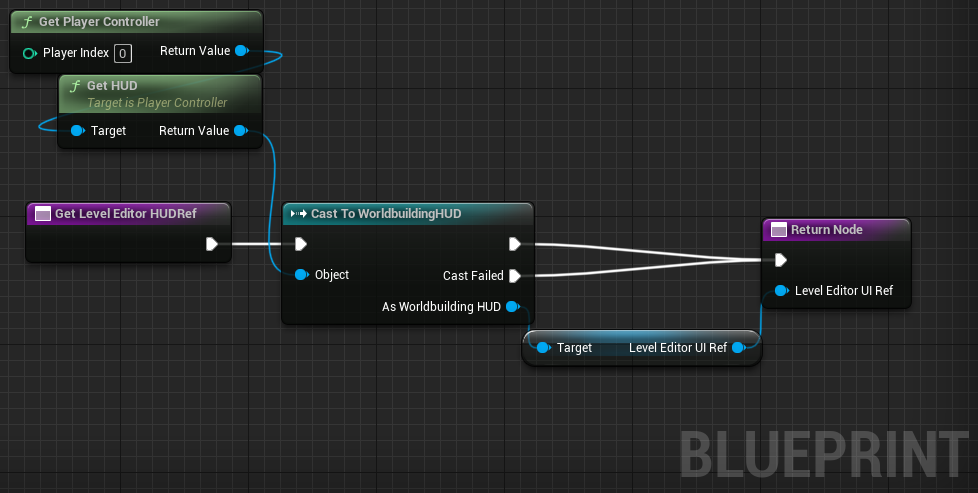
To facilitate more ergonomic interaction between the Tile Manager and the HUD, I created a simple function GetLevelEditorHUDRef to return a reference to the UI.
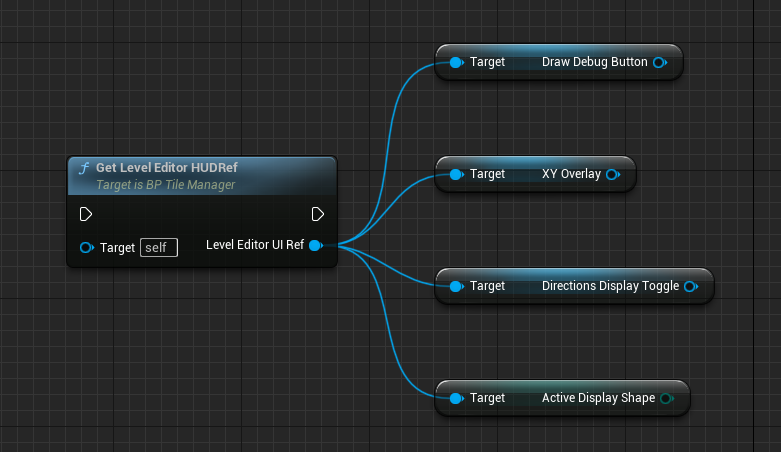
Here’s an example showing how this function can be used to easily access variables and elements from the UI.
Making the HUD functional
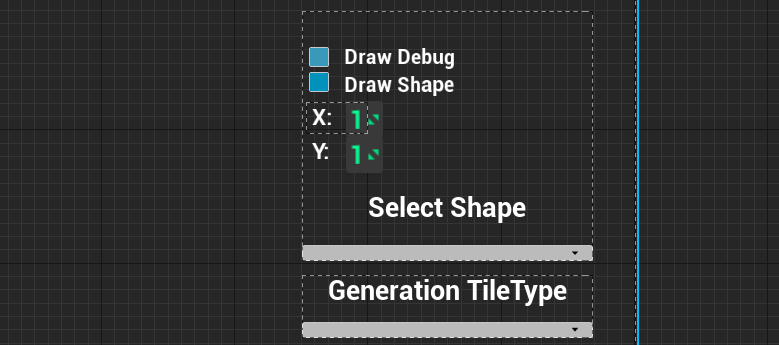
At this point I started putting together the actual UI elements on the Canvas panel (this is the WB_UI we created previously).
This is just a combination of basic TextBlock elements, ComboBox elements for the drop down menus, and SpinBox elements to select values for X and Y. They are then grouped together with Overlays.
To make these ComboBox elements (drop down menus) functional, we need a few things:
-
Set up an
On Selection Changedevent for theComboBox -
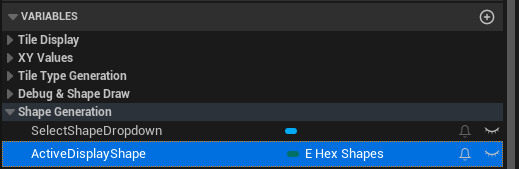
A local variable that is of the type of the existing enumerator you want to use (if you don’t already have one, you need to make one)- in this case, I set a variable
ActiveDisplayShapeof typeE_Hex_Shapes
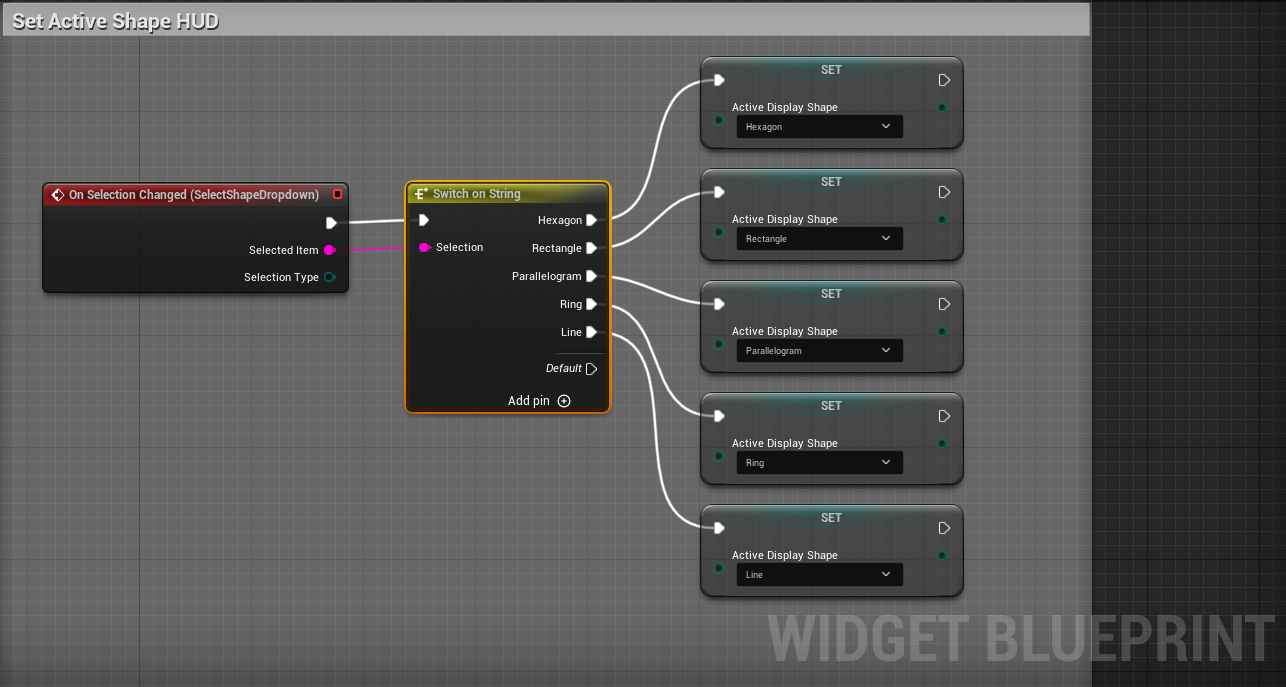
- The
Switch on Stringnode- This is a little clunky having to manually fill in array elements corresponding to the enum elements, but it is what it is. Each of these output pins is then used toSettheActiveDisplayShapevariable to the appropriate value. The Event Graph for the UI now looks like this:
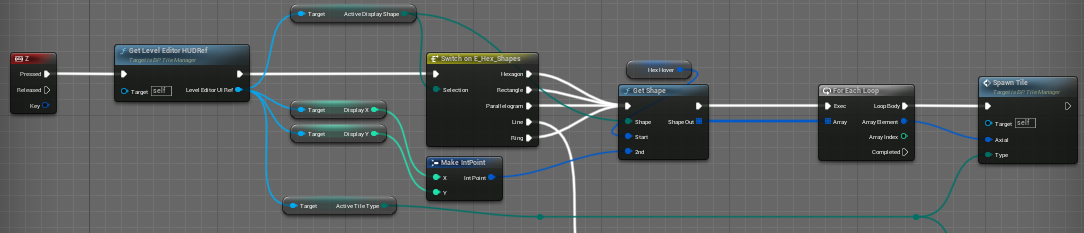
Now we can bring it all together. From our Tile Manager event graph we call the GetLevelEditorHUDRef function to get the necessary variables from the HUD- the Active Display Shape, the X and Y values to be used in that shape, and the Active Tile Type (the type of terrain that should be generated). Because the Line shape requires different generation logic than the other shapes, a switch statement is used to route Line separately from the other shapes. The coordinates for the shape to be generated are created by taking the axial coordinate of the hex that is currently being hovered and the X and Y coordinates taken from the SpinBox in the HUD. Finally, we just loop through the array holding the coordinates of the shape to be generated, and spawn a tile of the appropriate type at that location.
Bonus
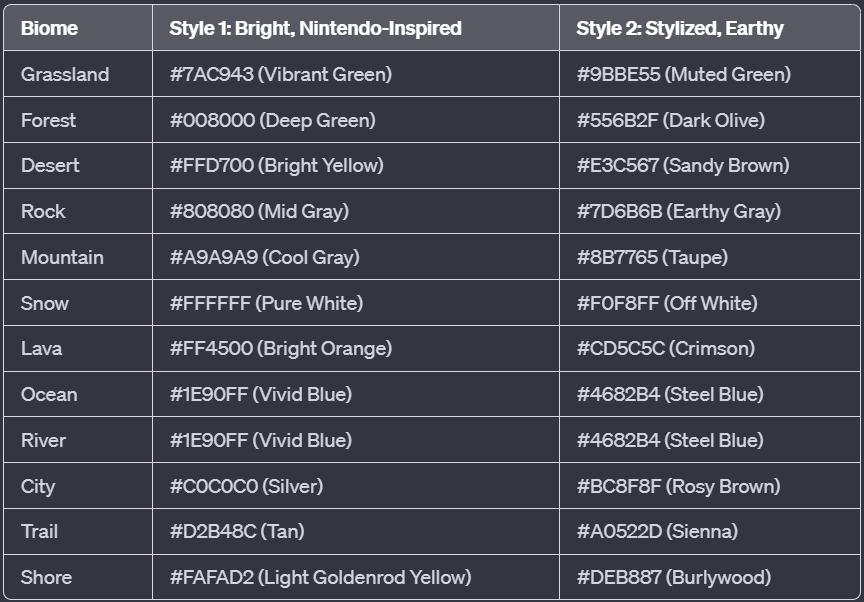
ChatGPT is awesome for generating Color Palettes.
I prompted it with a list of Biomes I wanted to represent and a brief description of what styles I wanted it to try, and it produced the following table
Then it’s a simple matter of copying and pasting the hex codes in to create representations of the color palettes in game. Then you can swap different color palettes in and out for easy testing, it’s fantastic. This is a super effective way to quickly test out aesthetic ideas, striking a sweet spot between the speed of throwing together random colors, and the time and effort required to dial in specific materials.
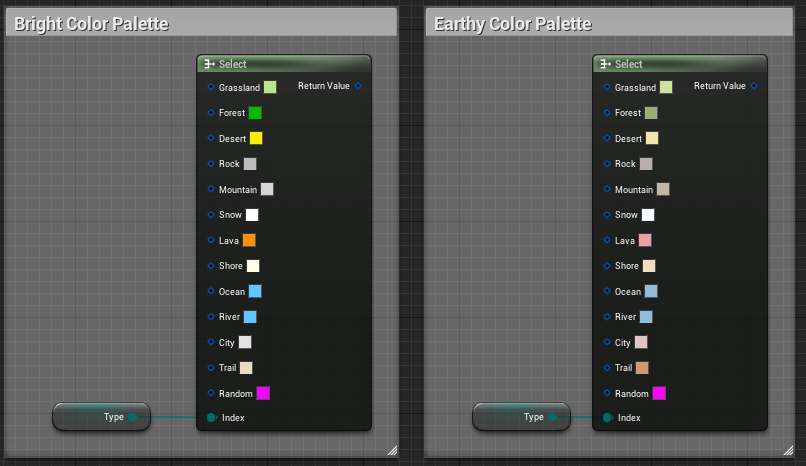
I used this color palette (the ‘Stylized, Earthy’ one) in the demo gif above, which you can get a good overall sense for when paired with the ‘Random’ tile type as shown.