
GameDevlog 4: Movement I
Overview
With basic controls in place to create and manipulate a Tile Map, time to shift gears for a bit and get a character in play to get closer to our short-term goal of being able to prototype core movement mechanic concepts.
requirements
- Implement basic character locomotion
Learning Goals
- Understand the basics of Character Movement in Unreal Engine 5
- Understand the basics of Enhanced Input
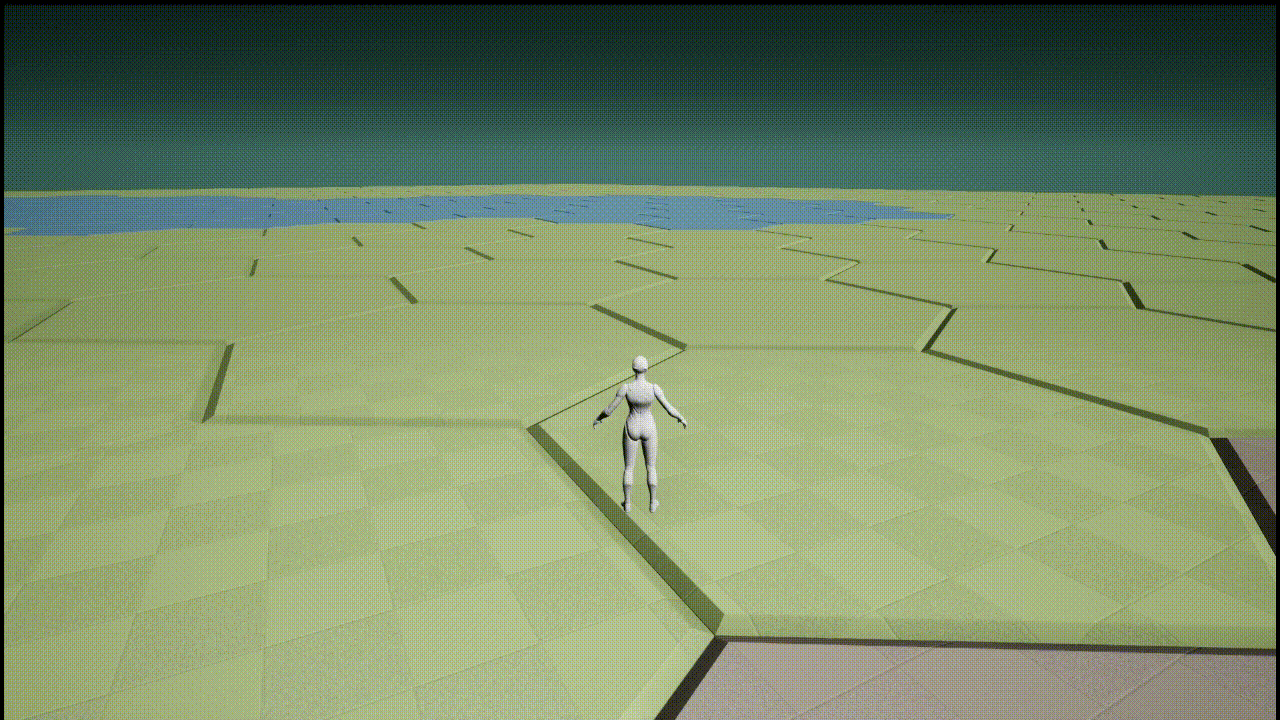
End Result
Starting Off
The initial progress in this entry was pretty straightforward, I basically just followed along with this Setting Up Character Movement Guide from the UE5 docs.
Migrating from Axis and Action Mappings
I followed along with the tutorial (skipping the animation parts) and got things working, but I did see this deprecation warning when setting up the bindings:
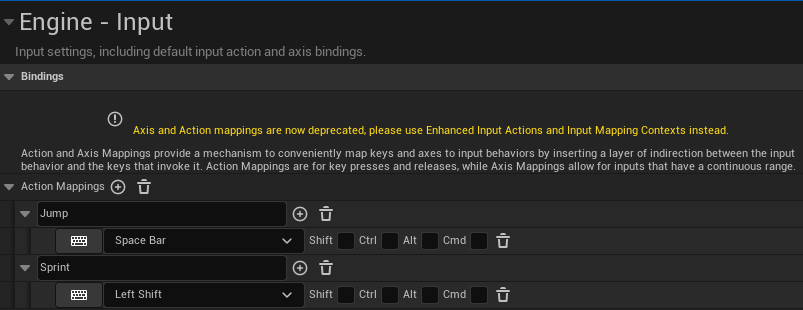
So I’m going to try to migrate those over.
I’m not positive, but I think the Enhanced Input features will ultimately be helpful for the movement system I have in mind, so to begin with, we’ll just migrate over one action to test it out.
The documentation here is good, but it holds your hand a little less the ‘Setting Up Character Movement Guide’ listed above, so I’ll try to connect the dots a little here. You know, in case your hand is getting cold.

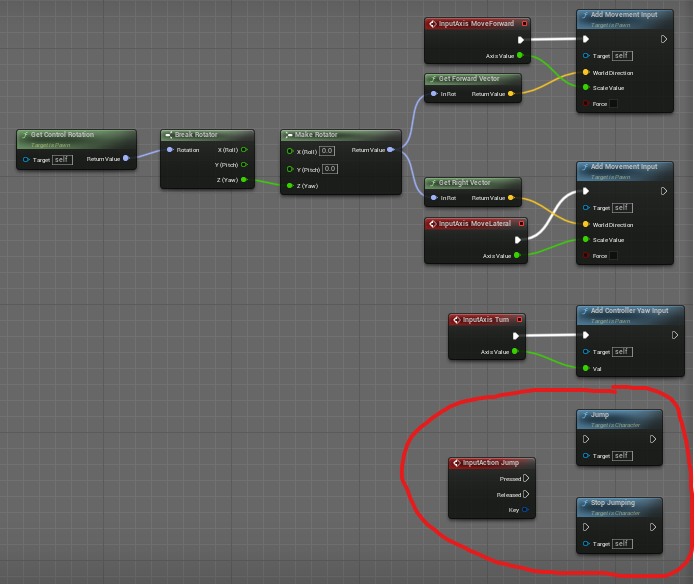
We’ll start with Jumping, so I’ll disconnect the Jump node from the previous setup. This is more or less what you’ll have after following along with the ‘Setting Up Character Movement Guide’ (this is on the event graph for the PlayerCharacter blueprint).
To replace that functionality with Enhanced Input we’re going to need two things:
- An
Input Action, and - An
Input Mapping Context
Both of which you can create by right-clicking in the content drawer and looking under Input

Input Action
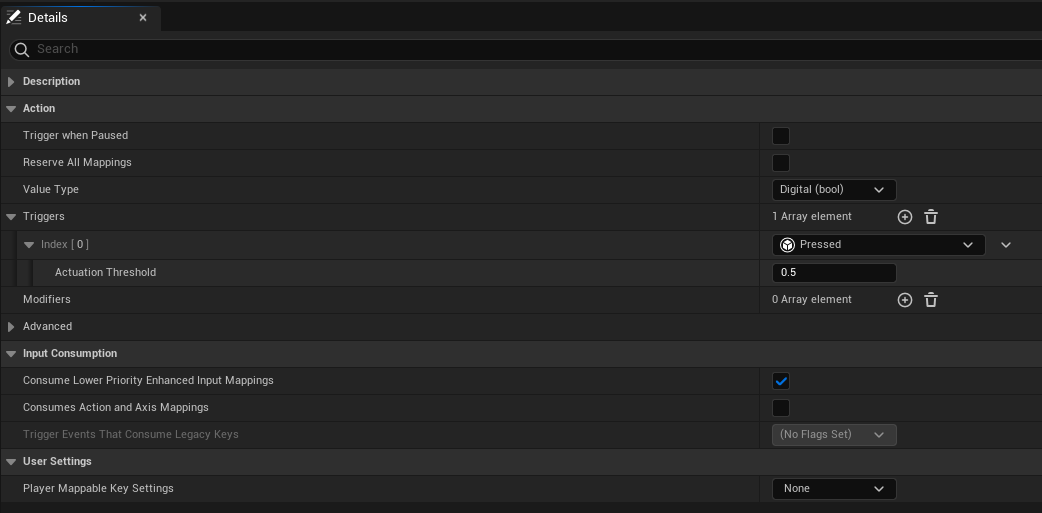
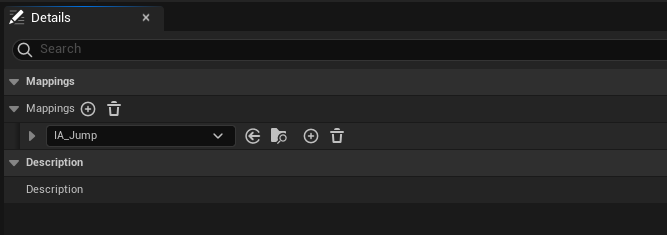
I created the Input Action asset first, and labeled it IA_Jump.
I set the Value Type to Digital (bool), and under Triggers added 1 element, Pressed. Everything else I left as default, so the settings look like this
Input Mapping Context
Then I created the Input Mapping Context asset, and labeled it IMC_CharacterMovement.
I added a single mapping, in which I selected the IA_Jump asset I made in the previous step. And that’s it.
Hooking It Up
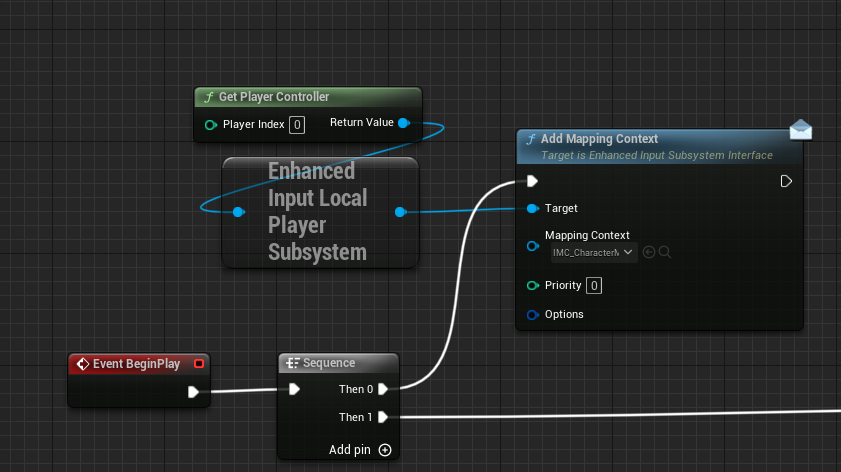
There are two steps to hooking it all up in the event graph.
First we need to add the Mapping Context. I’m currently handling this on the event graph for the PlayerCharacter asset, so I don’t need to Cast to PlayerController like is shown in the documentation. Instead mine currently looks like this:
Then you just need to hook up the new EnhancedInputAction_IA_Jump listener with the same logic used with the original InputAction Jump listener. Also, at least the way it’s currently set up for me, I actually get the same results if I unhook the False branch from the Stop Jumping node- either way the jump stops at the same point and the character returns to the ground.
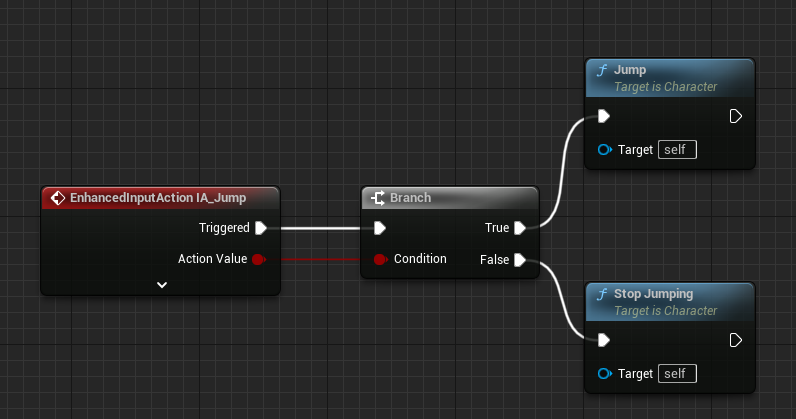
Great, jumping is working!

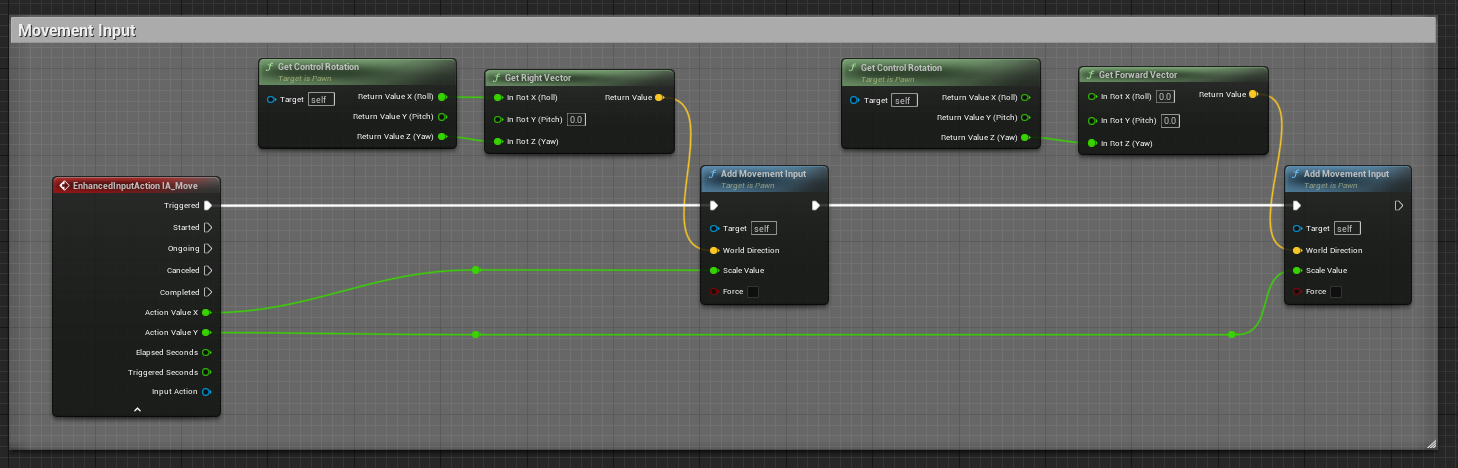
After getting jumping working, I had a hard time figuring out how to get the basic directional movement functionality implemented with Enhanced Input Actions, until I stumbled onto this awesome YouTube Tutorial by Matt Aspland which I highly recommend.
After following along I now have my Enhanced Input working for the camera.

and Enhanced Input working for WASD movement, which would have taken me a lot of trial and error were it not for that great tutorial. I had no idea you could break apart pins like that, very cool trick.
And that’s it! Testing now gives us the End Result gif shown at the top of the post.